
The method of kneading described in this recipe takes away any guesswork about how long to knead the dough and how long to allow the dough to rise! – Making this recipe the easiest beginner bread recipe!
Newbie or experienced bread maker – you’ll be sure to succeed with this recipe.
Ingredients
Warm Water. (105 -115°F) Make sure your water is warm enough to activate the yeast, but not so hot to kill the yeast. The temperature of 105°F should feel just a bit warmer than your normal skin temperature.
Active Dry Yeast. Yeast is a fungus made of microscopic cells which have the ability to multiply quickly. In the process of dividing and multiplying, yeast releases carbon dioxide and alcohol. This process is a form of fermentation and is what causes bread to rise!
When shopping for yeast, look for Active Dry Yeast or Instant Yeast. You’ll find it in little packets or in a jar. We suggest investing in the jar of yeast instead of the packet. Packets of yeast do not always have a precise amount of yeast. Yeast in a jar is easier to measure the exact amount for any recipe.
Honey or Sugar. Honey or sugar is an absolute necessity when making bread. It’s included in this recipe as the sugar helps to activate the yeast.
Salt. Why add salt to bread? It turns out salt has many roles in the chemistry of making bread.
- Salt adds flavor to bread! Without salt, bread would be extremely bland.
- Salt also acts as a yeast inhibitor. Salt slows yeast’s roll! Without salt, the yeast would go wild and eat all of the sugar in the flour causing your dough to overrise, collapse, and become flat.
- Salt also helps the dough develop gluten.
So as with all the ingredients in bread, salt is an important part of the magic of bread! With salt being such a key ingredient in bread, it’s important to use really good salt. We suggest Pacific Flake Sea Salt. This all-natural kosher flake sea salt is expertly produced from the crisp clear waters of the Pacific Ocean. This unrefined salt retains its natural trace minerals and has zero additives or chemical processing.
Flour. No need to purchase any special flour for this recipe. All-Purpose flour works just fine. If you have bread flour available, it also works well in this recipe.
All-purpose flour and bread flour come from different varieties of wheat. Hard spring wheat which is ground into bread flour has a bit more protein. Protein helps to develop the gluten in bread dough. For homemade bread, the difference between the two flours is hardly noticeable.
Oil. This recipe calls for just enough oil to grease your loaf pan. Use any kind of neutral oil you have.
Technique or How To Make Bread
There are 4 distinct steps to making bread
First, it’s important to have everything ready to go as timing is a part of the chemistry of bread making.
- Read the directions thoroughly and make sure you understand the steps.
- Have your dry ingredients ready in a bowl
- Measure out your water and yeast.
- Have a clean warm countertop for the rising step.
- Grease and set aside the loaf pan.
Second, proof your yeast. Add yeast to the recommended amount of water. Drizzle in your honey or sugar.
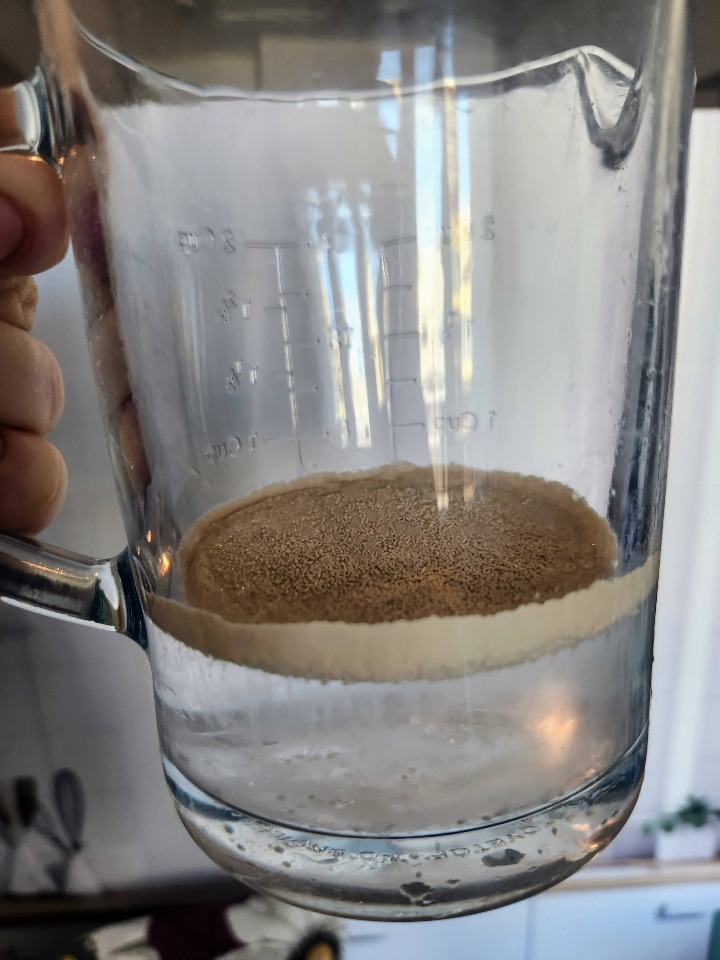
Add your yeast to the water. Gradually, it will absorb water and sink to the bottom of the water.
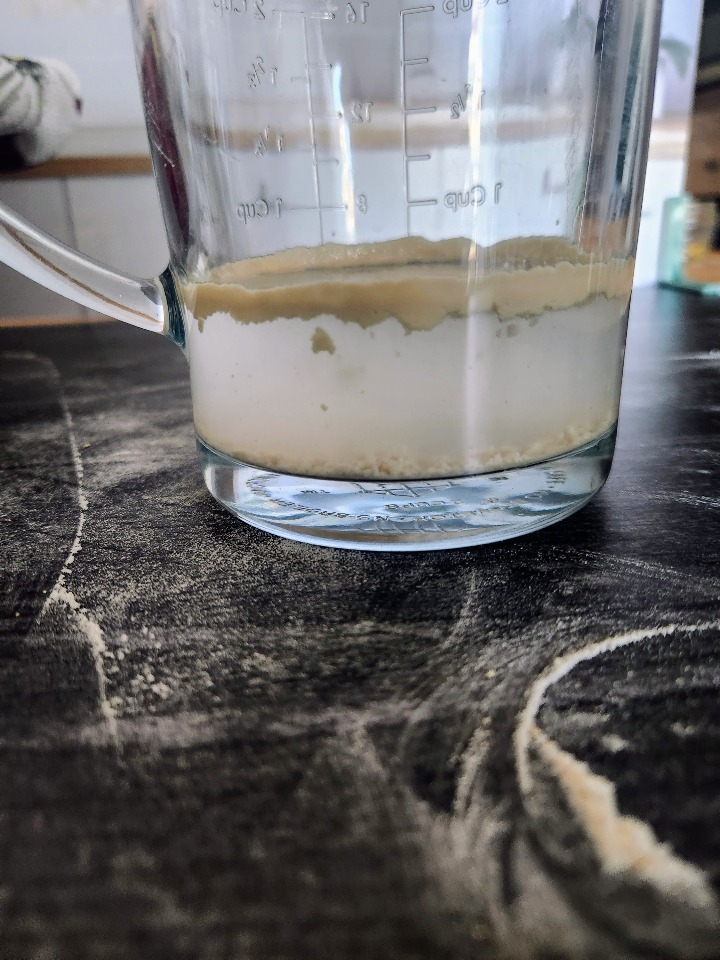
After 5 – 10 minutes the yeast will have woken up and the water will be cloudy and a bit of fizz will come to the surface.
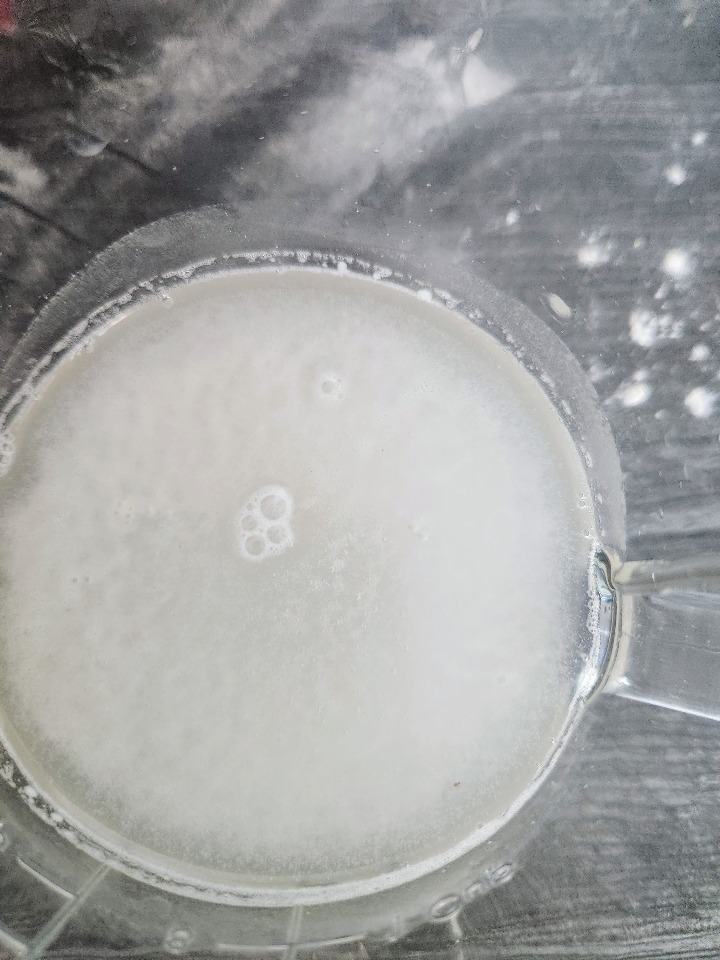
If your yeast doesn’t proof (or wake up), start over. Make sure your water is warm enough to activate the yeast, but not so hot to kill the yeast. The temperature of 105°F should feel just a bit warmer than your normal skin temperature.
If correcting the temperature of the water doesn’t cause the yeast to prove, then your yeast could be dead. It’s important to have fresh yeast. Check the expiration date of your yeast. And after opening the yeast, keep it in the refrigerator.
Third, bring your bread together and knead. Now that you’ve activated the yeast, it’s time to add it to the rest of the bread ingredients.
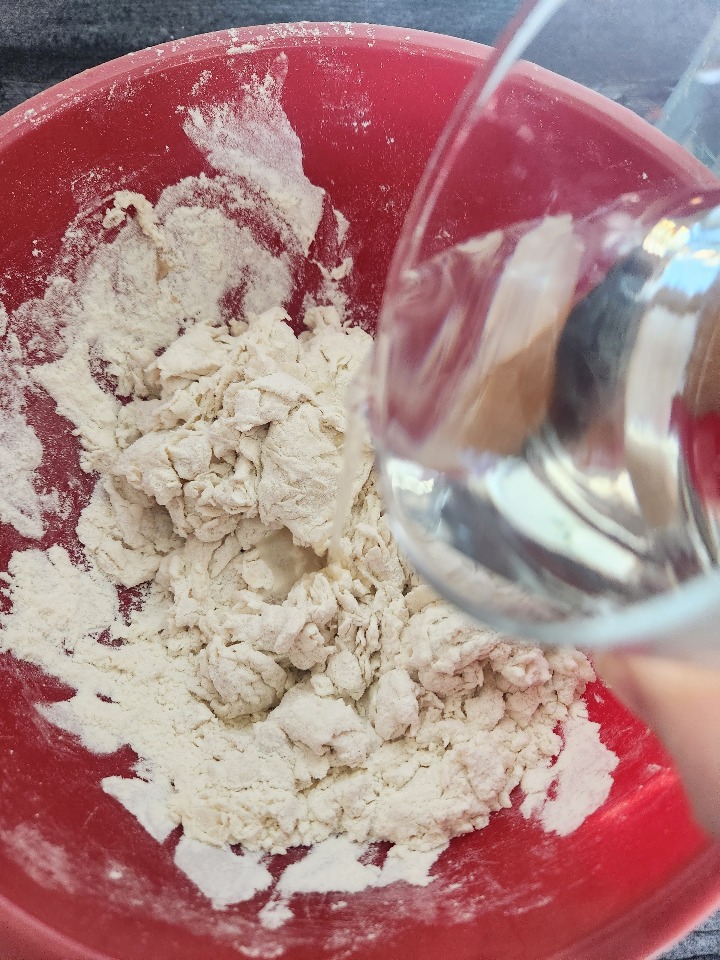
Combine the yeast mixture and the flour and salt. Using a spoon stir everything together. The mixture will be crumbly, but should all come together into a dough.
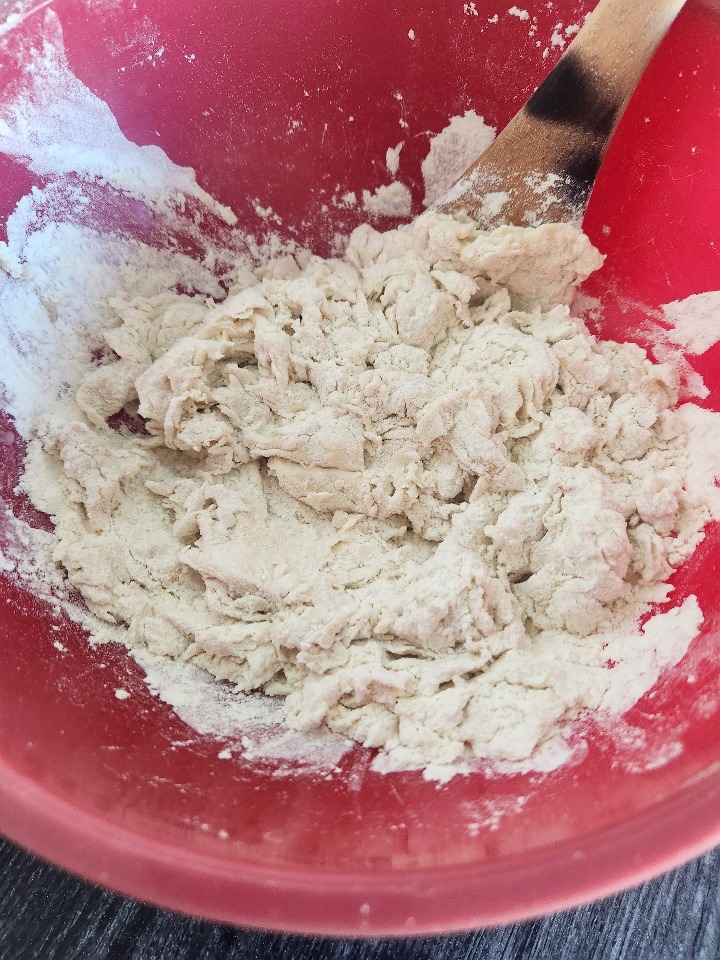
If the mixture is just too dry, add more water 1 tablespoon at a time until the dough just comes together.
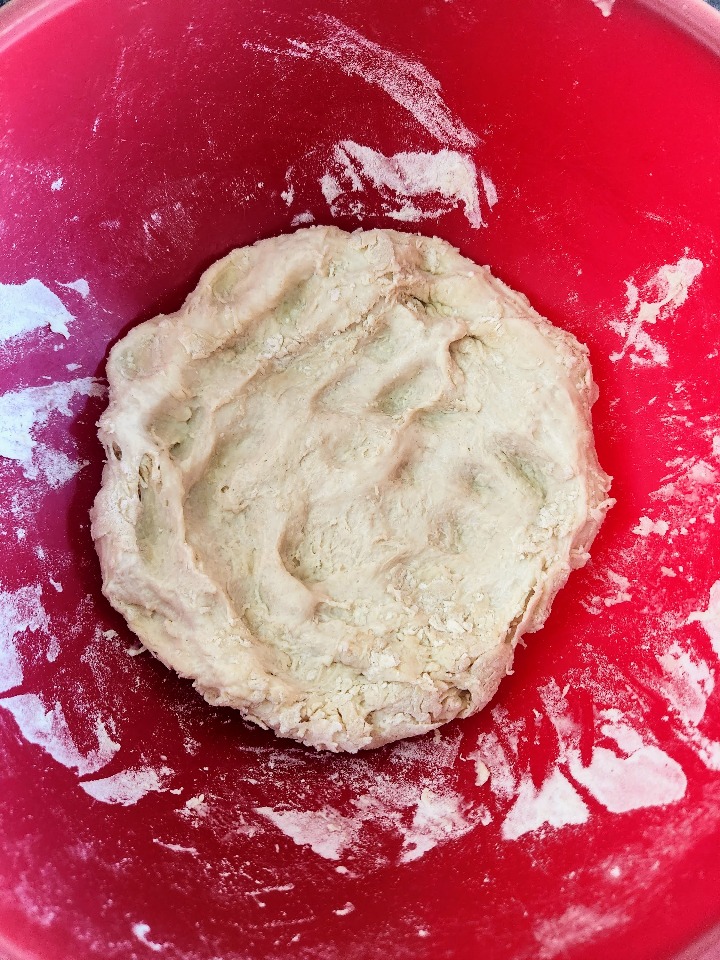
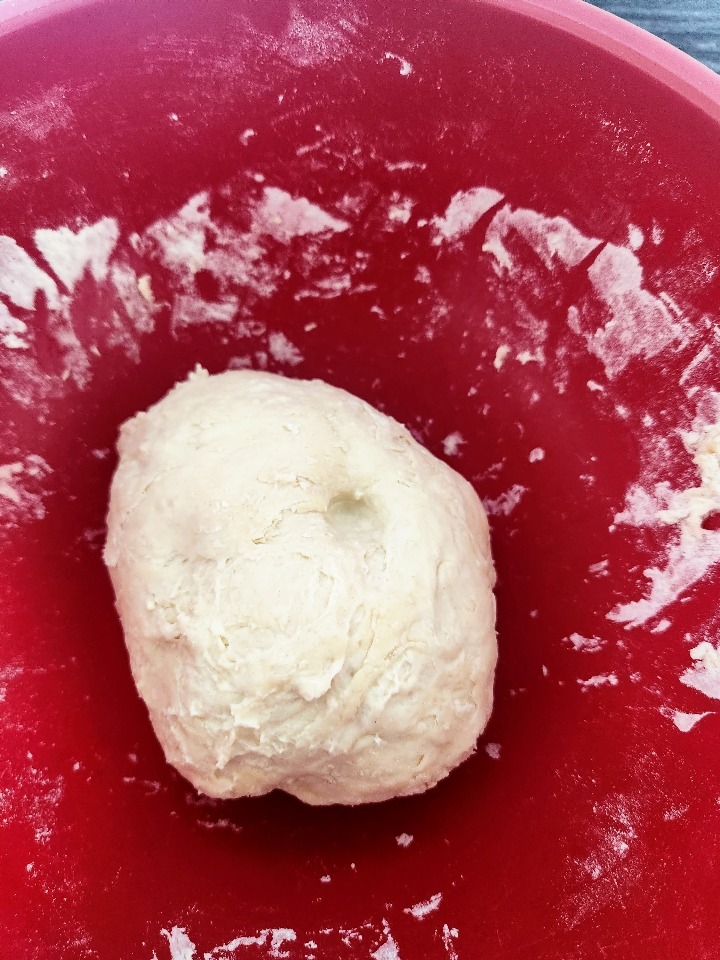
Your bread dough will come altogether into a ball. It will still be matte and a little rough looking.

Cover the beginning of your bread with another bowl or a dish towel. Allow it to rest for 10 minutes.
After 10 minutes of resting, it is time to begin kneading the dough.
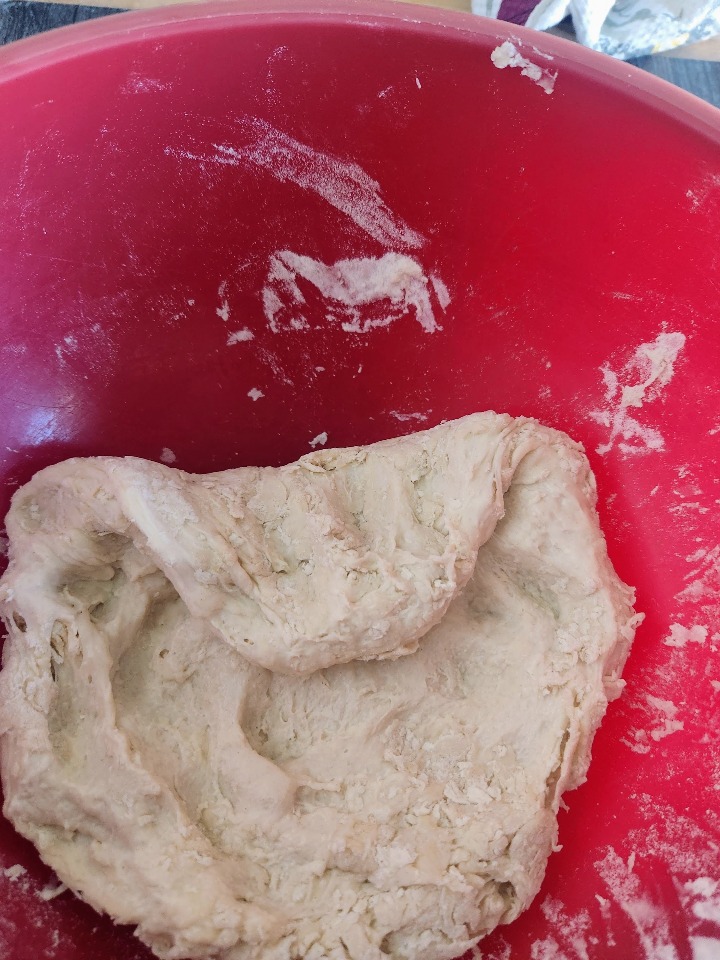
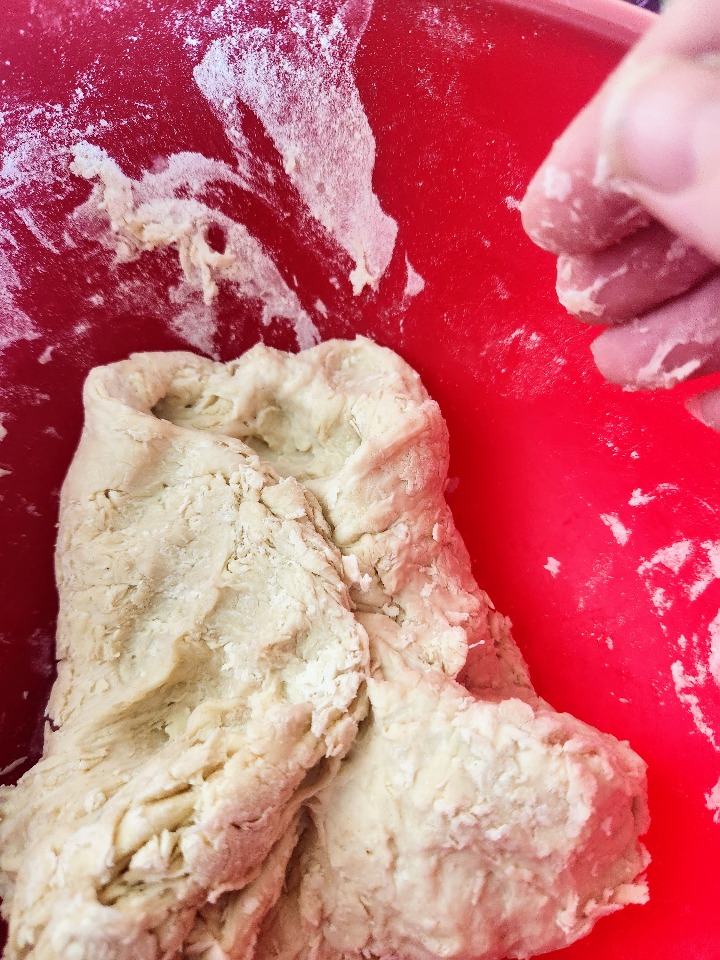
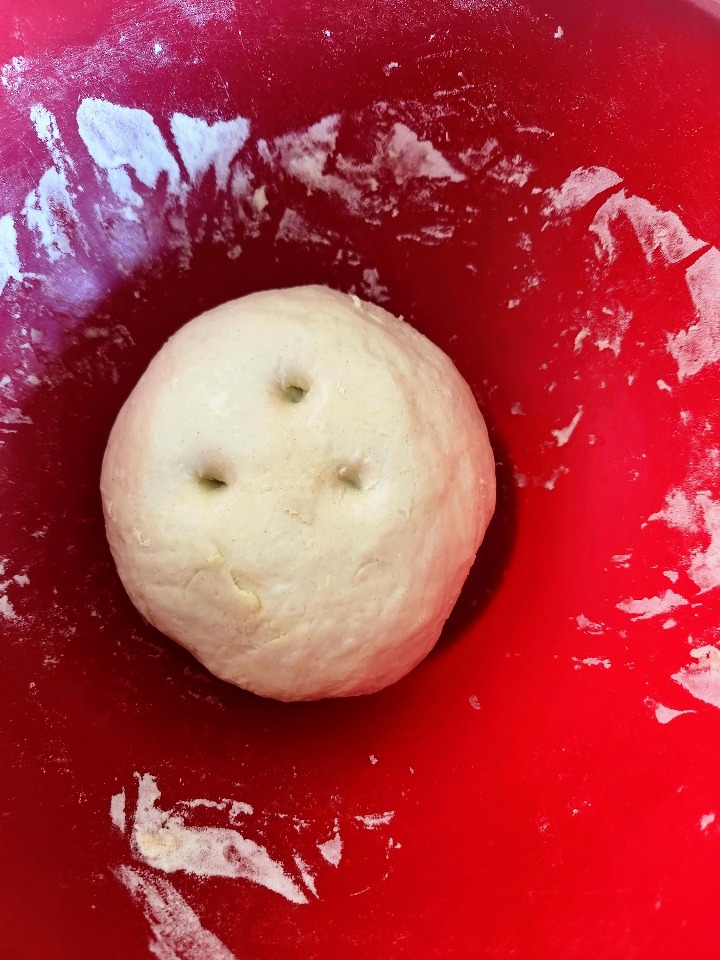
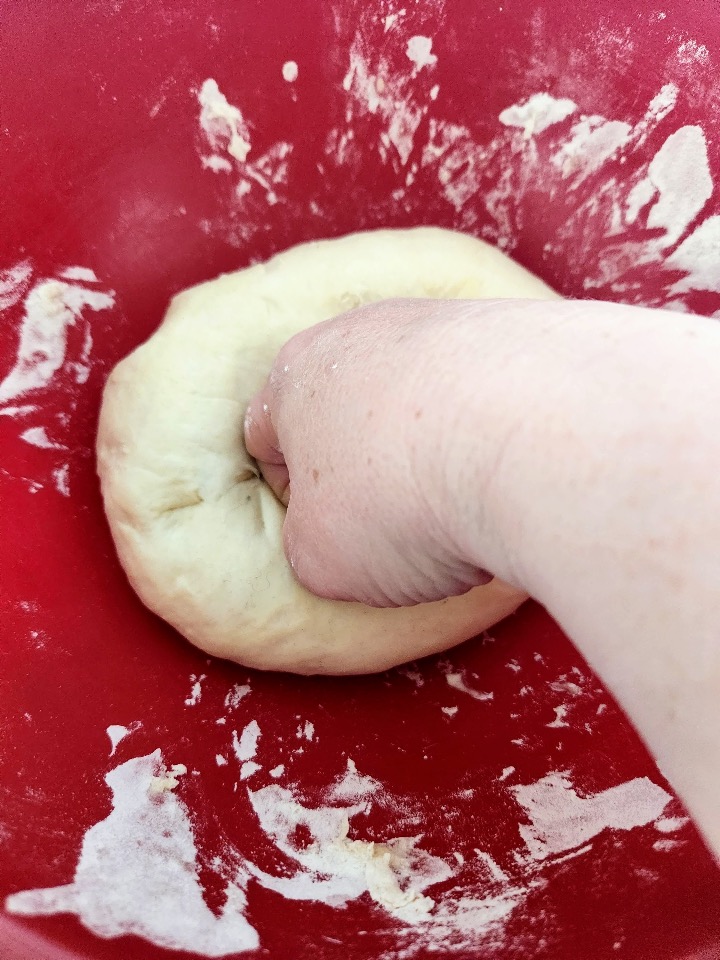
Working right in your bowl, flatten the dough into a pancake shape. Then lift up one side of the dough and fold it up onto the dough disk. Turn your bowl 90° clockwise and lift up another portion of dough onto the disk. Again, turn the bowl 90° clockwise and repeat that same action for a total of 10 turns. Now turn the dough upside down. Wet your finger and poke an indentation in the dough. Allow it to rest for 10 minutes.
After 10 minutes, repeat the process of flattening the dough and then kneading it by turning it 90° clockwise for 10 turns!
Continue repeating this process every ten minutes. Each time add an additional indentation so you’ll know how many times you’ve repeated this process!
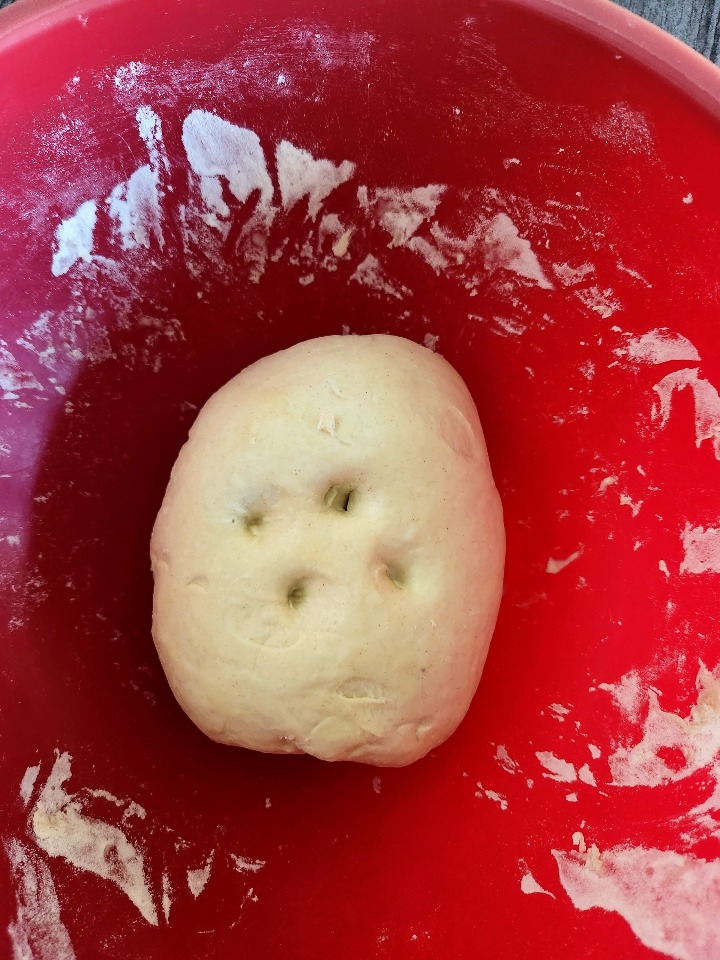
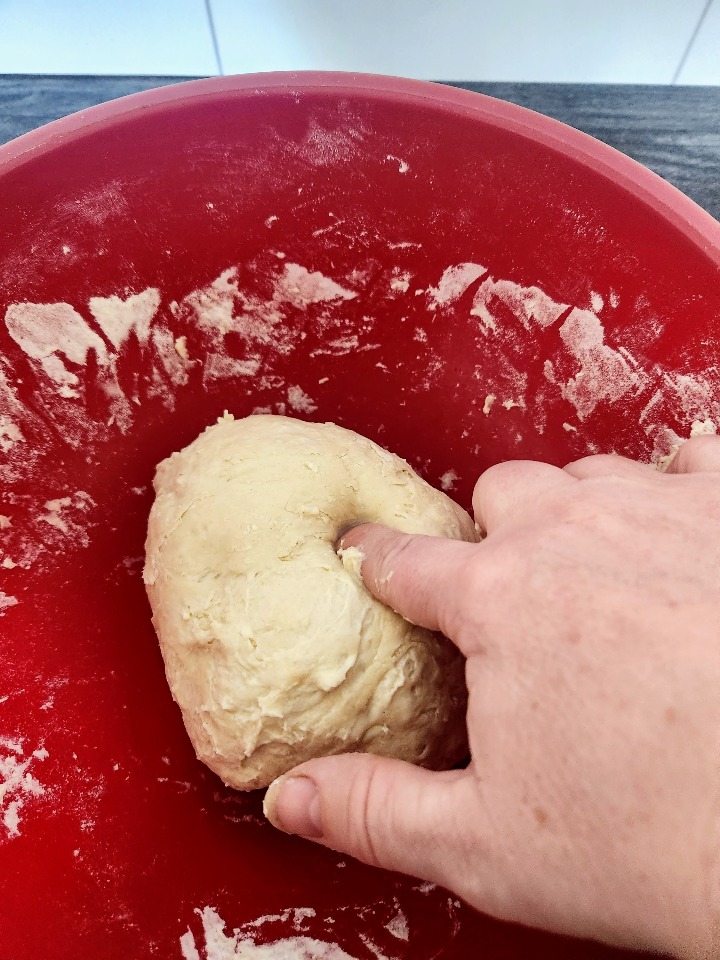
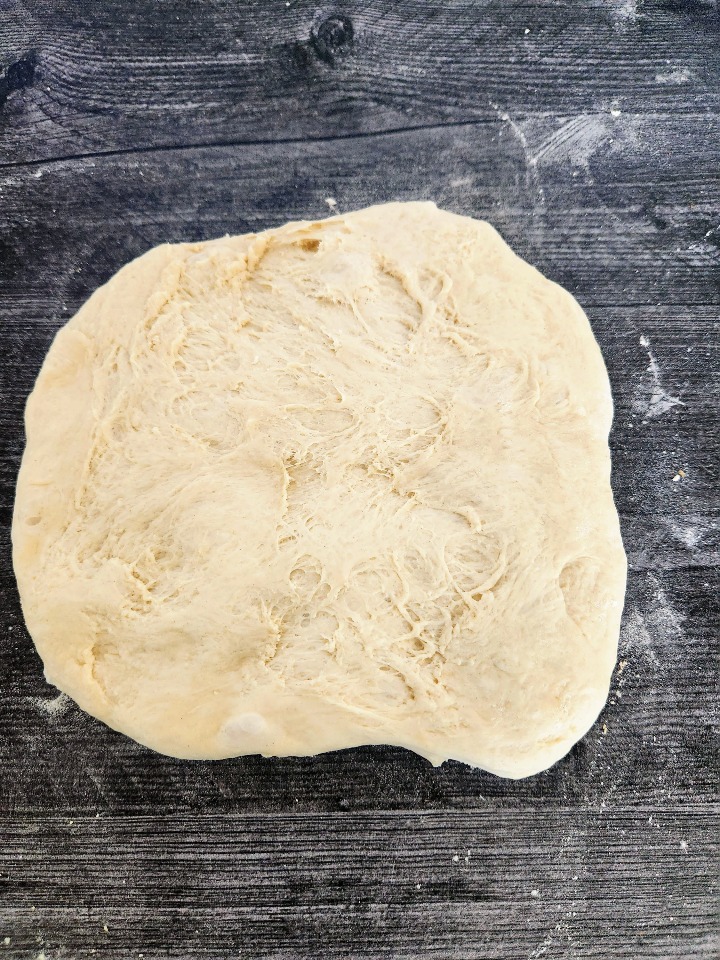
After four turns at kneading your dough, it should be shiny, smooth, and elastic. If it still hasn’t reached that stage, repeat the process one – two more times.
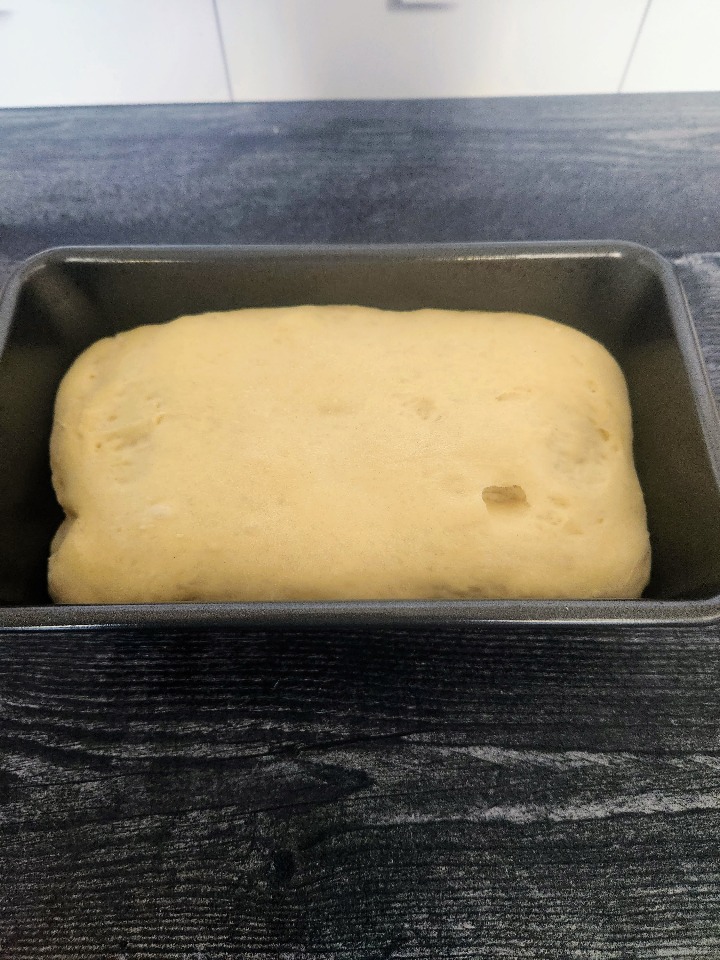
Now your bread dough is ready for its first big rise! Let it sit in the bowl covered loosely with a tea towel for one hour. After one hour, your dough should have at least doubled in size and your finger indentations will have most if not all but disappeared!
Now comes the part we find the most enjoyable – Punching down your dough!
Gently punch down the dough to release all the trapped air from the dough.
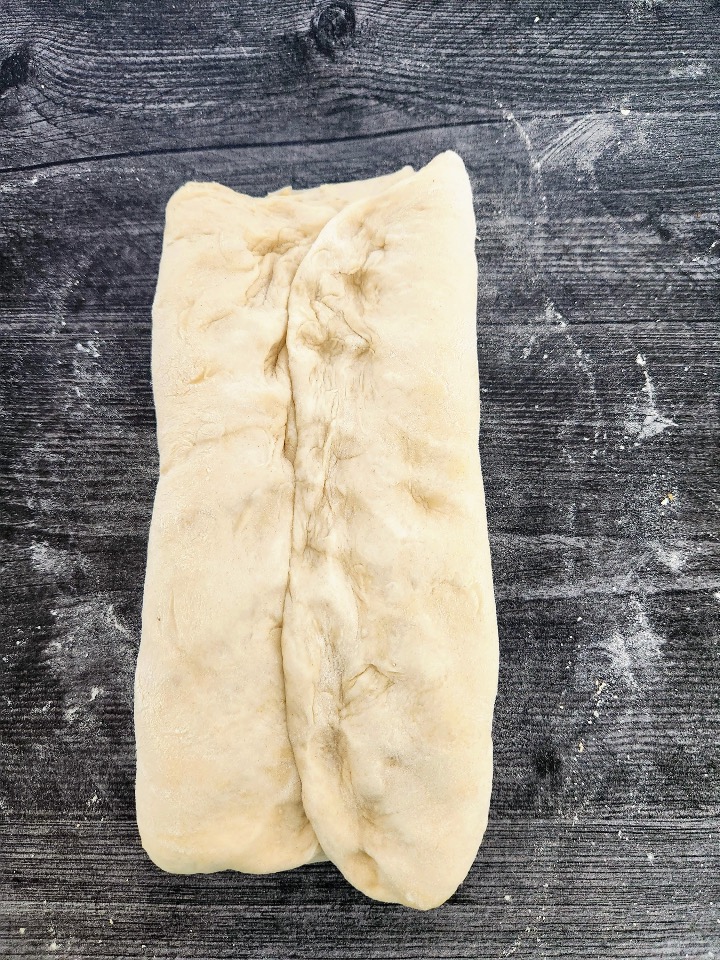
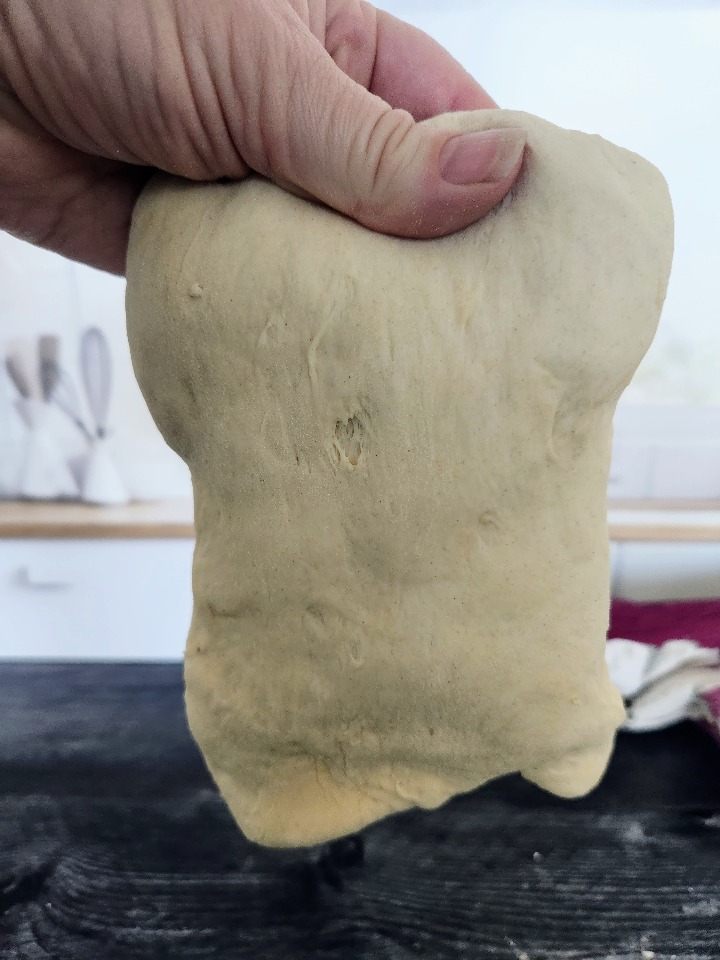
Then transfer the dough onto a lightly floured surface. Flatten your dough out into a rough square. Take the right-hand side of the dough and fold it into the middle. Do the same with the left-hand side of the dough.
Next, fold the bottom third of the dough up to the middle of the rectangle. Repeat with the top third of the dough.
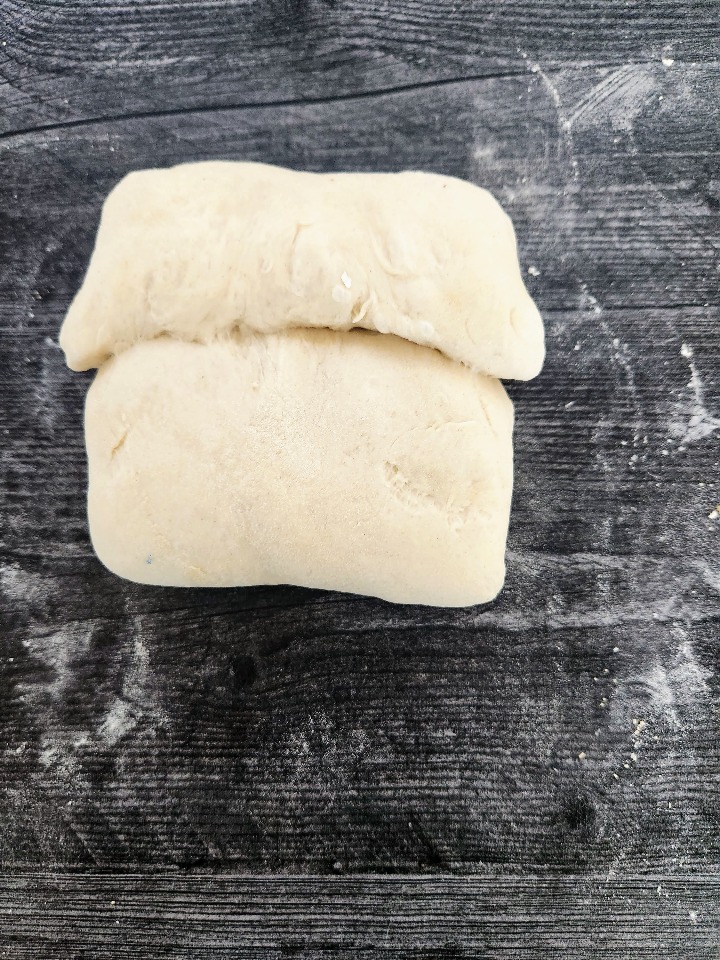
Now, you’ll take the dough and lift it up off your surface, and let gravity pull the dough downward. Flip the dough over and let gravity pull the other side down until the dough is about the shape of your loaf pan.
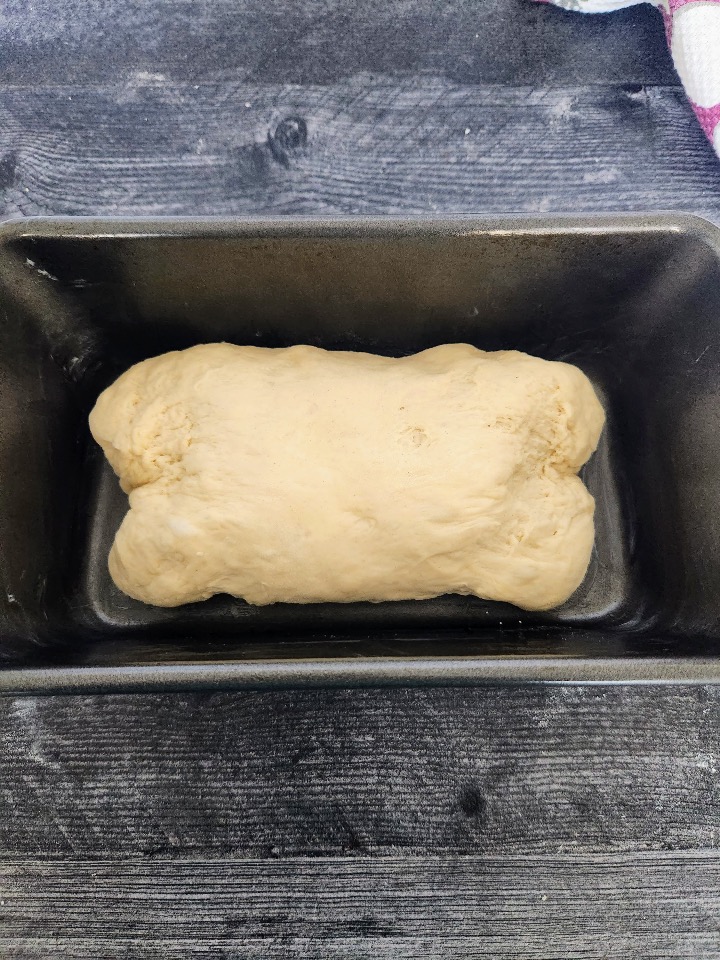
Place the dough into your oiled loaf pan. Cover lightly with a tea towel and let rise for one more hour.
The last 15 minutes of the rise, preheat your oven to 400°F.
Fourth. And finally, we’ve come to the last step of baking! Slide your loaf of bread into the oven. Bake for 35 minutes. Slide out your load of bread. Tap the bottom of the loaf.
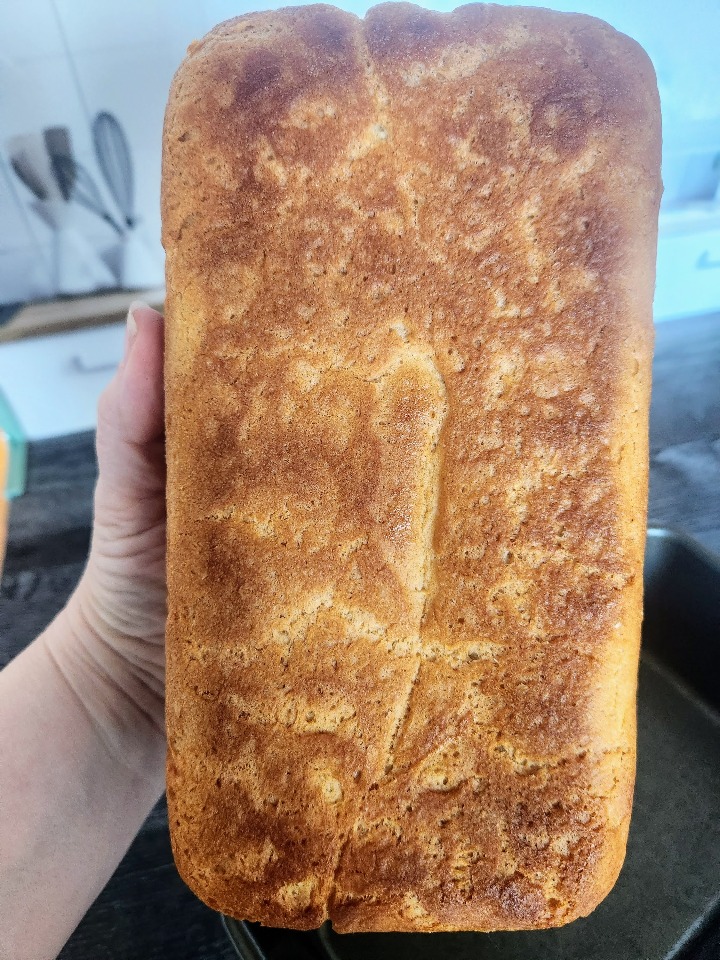
It should sound hollow. If it doesn’t, place it back in your pan. And bake for a few minutes longer!
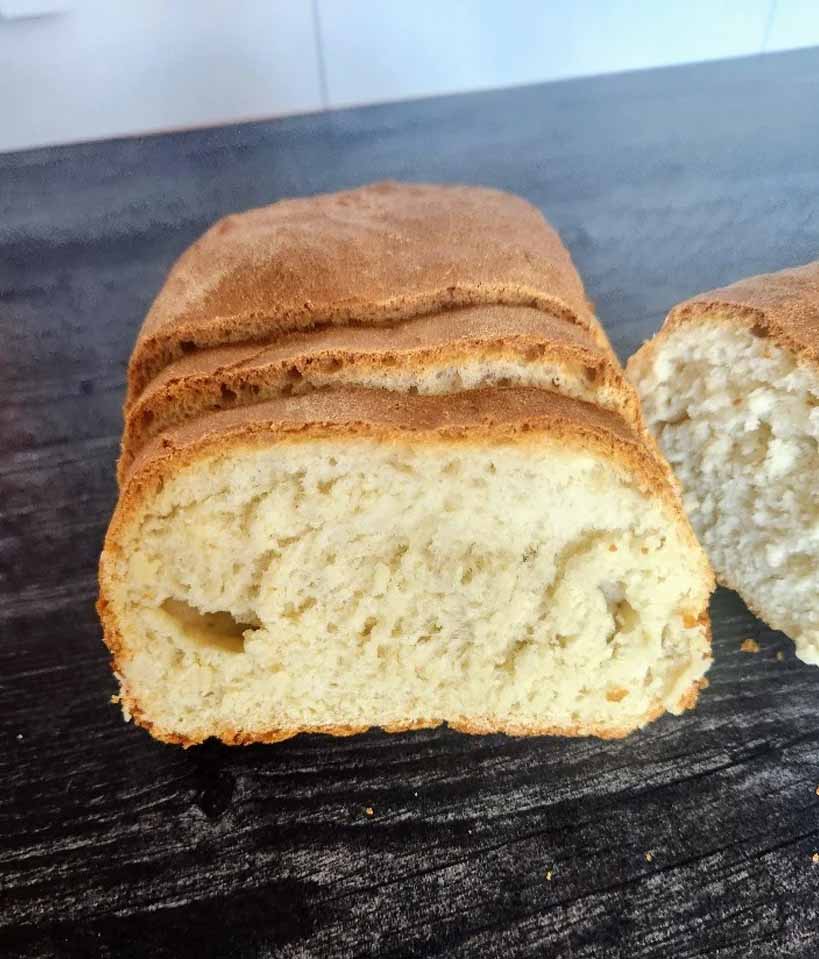
And that folks is a simple homemade bread recipe. It does take time, but the recipe is straightforward and you will be well rewarded for the effort! There is nothing like a fresh loaf of bread straight out of the oven!

SpiceTopia’s Homemade Bread Recipe
Homemade Bread Recipe
Instructions
-
Combine the flour and salt in a large bowl. Set aside.
-
Combine the yeast, ¾ cups water, and sugar/honey in a small bowl or cup.
-
Allow the yeast mixture to proof for 5 - 10 minutes. See the above technique notes for full understanding of this step.
-
After yeast has foamed, add the yeast mixture to the flour mixture. Stir until combined fully.
-
Add 1 tablespoon of water at a time if needed. See above technique notes for full understanding of this step.
-
Form dough into a ball, cover, and allow to rest for 10 minutes.
-
In the bowl, knead the dough for 10 turns. See above technique notes for full understanding of this step.
-
Set aside to rest for 10 minutes and repeat 3 - 5 times. See above technique notes for full understanding of this step.
-
After the 4th to 6th cycle of kneading, set bowl in a draft-free warm place with a tea towel draped over the top of the bowl. Allow to rise for 60 minutes.
-
Gently punch down the dough to release all the trapped air from the dough. Then transfer the dough onto a lightly floured surface and shape into a loaf shape. See above technique notes for full understanding of this step.
-
Place shaped dough into the oiled loaf pan. Place loaf pan in a draft-free warm place with a tea towel draped over the top of the bowl. Allow to raise for 60 minutes. To check to see if the dough is ready to bake, gently poke with your finger. If the indentation springs back, the dough needs to continue to rise. If the indentation remains, the dough is ready to bake.
-
Place loaf of bread in the preheated oven. Bake for 35 minutes.
-
Remove from oven. Carefully remove the loaf from the pan. Check the bottom of the loaf to make sure it is baked. Tap the bottom of the bread. If it sounds hollow, it is baked. If it isn’t completely baked, slide back in the oven for 5 more minutes before checking for doneness again.
-
Allow to cool before slicing.
-
Enjoy!